quarta-feira, 15 de abril de 2015

How to install an Opensource VPN Server on Linux

One of the most concerning thoughts I have while browsing, Is how can I ensure that my data remains private and secure ? In my search for answers, I came cross a number of ways in which you can remain anonymous like using a proxy website. But still using a third party service was not assuring enough. What I needed was a software which could be installed and run by me thus ensuring that I and only I would have access to the data.
So what is such a software called?
It’s called a VPN or short for Virtual Private Network. It allows you to encrypt your data when you connect through it.
In this Linux Tutorial , I will be installing an OpenVPN Access Server on CentOS 7 . OpenVPN is easy to use, OpenSource and has community based support. It has clients for Windows,Android, and Mac.
How to install an Opensource VPN  Server on Linux

Step 1. Install OpenVPN Access Server on your Centos 7 Linux machine or VPS.
Download the package from https://openvpn.net/index.php/access-server/download-openvpn-as-sw.html, Ubuntu users can download appropriate packages and install OpenVPN Access Server on Ubuntu and Ubuntu based distros like raspbian as well.
[leo@vps ]$ cd /tmp
[leo@vps tmp]$ wget http://swupdate.openvpn.org/as/openvpn-as-2.0.10-CentOS7.x86_64.rpm
[leo@vps tmp]$ sudo rpm -Uvh openvpn-as-2.0.10-CentOS7.x86_64.rpm
Preparing...                          ################################# [100%]
Updating / installing...
   1:openvpn-as-0:2.0.10-CentOSrelease################################# [100%]
The Access Server has been successfully installed in /usr/local/openvpn_as
Configuration log file has been written to /usr/local/openvpn_as/init.log
Please enter "passwd openvpn" to set the initial
administrative password, then login as "openvpn" to continue
configuration here: https://yourhostIP:943/admin
To reconfigure manually, use the /usr/local/openvpn_as/bin/ovpn-init tool.

Access Server web UIs are available here:
Admin  UI: https://yourhostIP:943/admin
Client UI: https://yourhostIP:943/
Step 2: Setup a password for an OpenVPN client
[leo_g@vps ]$passwd openvpn
Step 3: Log into the server via the admin Url https://yourhostIP:943/admin and start the server.
Install OpenVPN on Cent OS 7
Type in the username “openvpn” and the password you set earlier
Install OpenVPN on CentOS 7
Step 4: Install the client from the Client Url. ( It will give you an option to download the Installer)
How to Install OpenVPN on CentOS 7
You can read instructions here on how to install it for your OS.
Step 5: Connect to your server with your username and password that you created earlier.
Install OpenVPN on CentOS 7
That’s it, you can goto whatismyip.com and check your IP, should be that of your CentOS 7 OpenVPN Access Server.

segunda-feira, 13 de abril de 2015

Setup Help Desk System Using OTRS On CentOS 6.5

by 

Please shareShare on FacebookShare on Google+Tweet about this on TwitterShare on LinkedInShare on RedditDigg thisShare on StumbleUpon

Introduction

OTRS, stands for Open source Ticket Request System, is a popular help desk software that can be used to assign tickets to incoming queries, and tracks further communications when needed. using OTRS, we can manage incoming inquiries, complaints, support requests, defect reports, and other communications.
In this tutorial, let us see how to install OTRS latest version on CentOS 6.5. Here, my testbox details are given below:
  • Operating System: CentOS 6.5 Minimal
  • IP Address: 192.168.1.2/24
  • Hostname: server.unixmen.local

Prerequisites

Before installing OTRS, we have to do couple of prerequisites first.
First, make sure you have configured the proper FQDN name in /etc/hosts file.
vi /etc/hosts
Set the hostname as shown below:
127.0.0.1   localhost localhost.localdomain localhost4 localhost4.localdomain4
 ::1         localhost localhost.localdomain localhost6 localhost6.localdomain6
 192.168.1.2     server.unixmen.local    server
Log off or restart the system to take effect the saved changes.
Install and enable EPEL repository.
Log in as root user and Install Mysql server using the following command:
yum install mysql-server
Start mysql service as shown below:
service mysqld start
chkconfig mysqld on
By default, Mysql root user is blank. So let us setup the root user password as shown below:
mysql_secure_installation
NOTE: RUNNING ALL PARTS OF THIS SCRIPT IS RECOMMENDED FOR ALL MySQL
 SERVERS IN PRODUCTION USE!  PLEASE READ EACH STEP CAREFULLY!

In order to log into MySQL to secure it, we'll need the current
password for the root user.  If you've just installed MySQL, and
you haven't set the root password yet, the password will be blank,
so you should just press enter here.

Enter current password for root (enter for none): -----> Press Enter
OK, successfully used password, moving on...

Setting the root password ensures that nobody can log into the MySQL
root user without the proper authorisation.

You already have a root password set, so you can safely answer 'n'.

Change the root password? [Y/n] y -----> Enter Y and press Enter
 New password: -----> Enter the new password
 Re-enter new password: -----> Enter password again
 Password updated successfully!
 Reloading privilege tables..
 ... Success!

By default, a MySQL installation has an anonymous user, allowing anyone
 to log into MySQL without having to have a user account created for
 them.  This is intended only for testing, and to make the installation
 go a bit smoother.  You should remove them before moving into a
 production environment.

Remove anonymous users? [Y/n] y -----> Press Enter
 ... Success!

Normally, root should only be allowed to connect from 'localhost'.  This
 ensures that someone cannot guess at the root password from the network.

Disallow root login remotely? [Y/n] y -----> Press Enter
 ... Success!

By default, MySQL comes with a database named 'test' that anyone can
 access.  This is also intended only for testing, and should be removed
 before moving into a production environment.

Remove test database and access to it? [Y/n] y -----> Press Enter
 - Dropping test database...
 ERROR 1008 (HY000) at line 1: Can't drop database 'test'; database doesn't exist
 ... Failed!  Not critical, keep moving...
 - Removing privileges on test database...
 ... Success!

Reloading the privilege tables will ensure that all changes made so far
 will take effect immediately.

Reload privilege tables now? [Y/n] y -----> Press Enter
 ... Success!

Cleaning up...

All done!  If you've completed all of the above steps, your MySQL
 installation should now be secure.

Thanks for using MySQL!
MySQL has been installed successfully with default options. In order to work properly with OTRS, we have to add the following directives into the my.cnf file.
Edit file /etc/my.cnf,
vi /etc/my.cnf
Add the following lines under the [mysqld] section:
max_allowed_packet=20M
query_cache_size=32M
Save and close the file.
Next, restart mysql service using the following command:
service mysqld restart
Next, Install httpd package with command:
yum install httpd
Start httpd service, and make it to start automatically on every reboot.
service httpd start
chkconfig httpd on
Edit file /etc/httpd/conf/httpd.conf,
cp /etc/httpd/conf/httpd.conf /etc/httpd/conf/httpd.conf.bak
vi /etc/httpd/conf/httpd.conf
Find the following lines and modify them as shown below:
ServerAdmin root@domain.com
ServerName [hostname or IP address]:80
Listen IP-address-of-the-server:80
Example:
ServerAdmin root@unixmen.local
ServerName 192.168.1.2:80
Listen 192.168.1.2:80
Save and close file. Restart httpd service.
service httpd restart
Adjust iptables to allow apache default port 80.
Edit file /etc/sysconfig/iptables,
vi /etc/sysconfig/iptables
Add the following line:
-A INPUT -p tcp -m state --state NEW -m tcp --dport 80 -j ACCEPT
Then, restart iptables to take effect the saved changes using the following command:
service iptables restart
Disable SELinux, otherwise you will get the following error:
If you want to use the installer, set the Kernel/Config.pm writable for the webserver user!
To disable SELinux, Edit file /etc/sysconfig/selinux,
vi /etc/sysconfig/selinux
Set value to disabled.
SELINUX=disabled
After that, reboot the system.

Download OTRS

Go to the OTRS download page and download the latest version.
wget http://ftp.otrs.org/pub/otrs/RPMS/rhel/6/otrs-3.3.6-01.noarch.rpm
The above will download and save the OTRS rpm file in the current directory. Install it using command:
yum install otrs-3.3.6-01.noarch.rpm
The above command will install otrs package along with all required packages.
Finally, restart httpd service one more time after installing OTRS.
service httpd restart
During OTRS installation, keep attention on the installer. It will display the web installer URL for OTRS.
Look at the following screenshot.
root@server:~_001

Install Additional PERL modules

Before proceeding to configure OTRS, you should install additional perl modules. Run the following command to know the required modules by OTRS:
/opt/otrs/bin/otrs.CheckModules.pl
Sample output:
o Crypt::Eksblowfish::Bcrypt.......Not installed! (optional - For strong password hashing.)
 o Crypt::SSLeay....................ok (v0.57)
 o Date::Format.....................ok (v2.22)
 o DBI..............................ok (v1.609)
 o DBD::mysql.......................ok (v4.013)
 o DBD::ODBC........................Not installed! (optional - Required to connect to a MS-SQL database.)
 o DBD::Oracle......................Not installed! (optional - Required to connect to a Oracle database.)
 o DBD::Pg..........................Not installed! (optional - Required to connect to a PostgreSQL database.)
 o Encode::HanExtra.................Not installed! (optional - Required to handle mails with several Chinese character sets.)
 o GD...............................Not installed! (optional - Required for stats.)
 o GD::Text.......................Not installed! (optional - Required for stats.)
 o GD::Graph......................Not installed! (optional - Required for stats.)
 o IO::Socket::SSL..................ok (v1.31)
 o JSON::XS.........................Not installed! (optional - Recommended for faster AJAX/JavaScript handling.)
 o List::Util::XS...................ok (v1.21)
 o LWP::UserAgent...................ok (v6.05)
 o Mail::IMAPClient.................Not installed! (optional - Required for IMAP TLS connections.)
 o IO::Socket::SSL................ok (v1.31)
 o ModPerl::Util....................ok (v2.000004)
 o Net::DNS.........................ok (v0.65)
 o Net::LDAP........................ok (v0.40)
 o Net::SSL.........................ok (v2.84)
 o PDF::API2........................Not installed! (optional - Required for PDF output.)
 o Compress::Zlib.................ok (v2.021)
 o Text::CSV_XS.....................Not installed! (optional - Recommended for faster CSV handling.)
 o Time::HiRes......................ok (v1.9721)
 o XML::Parser......................ok (v2.36)
 o YAML::XS.........................Not installed! (required - Please install this module - )
As you see in the above output, some perl modules are missing. Install them all at once or one by one as shown below.
yum install "perl(Crypt::Eksblowfish::Bcrypt)" "perl(DBD::ODBC)" "perl(DBD::Oracle)" "perl(DBD::Pg)" "perl(Encode::HanExtra)" "perl(GD)" "perl(GD::Text)" "perl(GD::Graph)" "perl(JSON::XS)" "perl(Mail::IMAPClient)" "perl(PDF::API2)" "perl(Text::CSV_XS)" "perl(YAML::XS)"
Now, check again for any missing modules.
/opt/otrs/bin/otrs.CheckModules.pl
Sample output:
o Crypt::Eksblowfish::Bcrypt.......ok (v0.009)
 o Crypt::SSLeay....................ok (v0.57)
 o Date::Format.....................ok (v2.22)
 o DBI..............................ok (v1.609)
 o DBD::mysql.......................ok (v4.013)
 o DBD::ODBC........................ok (v1.48)
 o DBD::Oracle......................Not installed! (optional - Required to connect to a Oracle database.)
 o DBD::Pg..........................ok (v2.15.1)
 o Encode::HanExtra.................ok (v0.23)
 o GD...............................ok (v2.44)
 o GD::Text.......................ok (v0.86)
 o GD::Graph......................ok (v1.44)
 o IO::Socket::SSL..................ok (v1.31)
 o JSON::XS.........................ok (v2.27)
 o List::Util::XS...................ok (v1.21)
 o LWP::UserAgent...................ok (v6.05)
 o Mail::IMAPClient.................ok (v3.34)
 o IO::Socket::SSL................ok (v1.31)
 o ModPerl::Util....................ok (v2.000004)
 o Net::DNS.........................ok (v0.65)
 o Net::LDAP........................ok (v0.40)
 o Net::SSL.........................ok (v2.84)
 o PDF::API2........................ok (v2.019)
 o Compress::Zlib.................ok (v2.021)
 o Text::CSV_XS.....................ok (v0.85)
 o Time::HiRes......................ok (v1.9721)
 o XML::Parser......................ok (v2.36)
 o YAML::XS.........................ok (v0.38)
If everything seems good, proceed to web installer.

Begin OTRS Web installer

OTRS development team has made a simple way web based installer to make the installation lot easier.
Open up the web browser and navigate to http://ip-address/otrs/installer.pl.
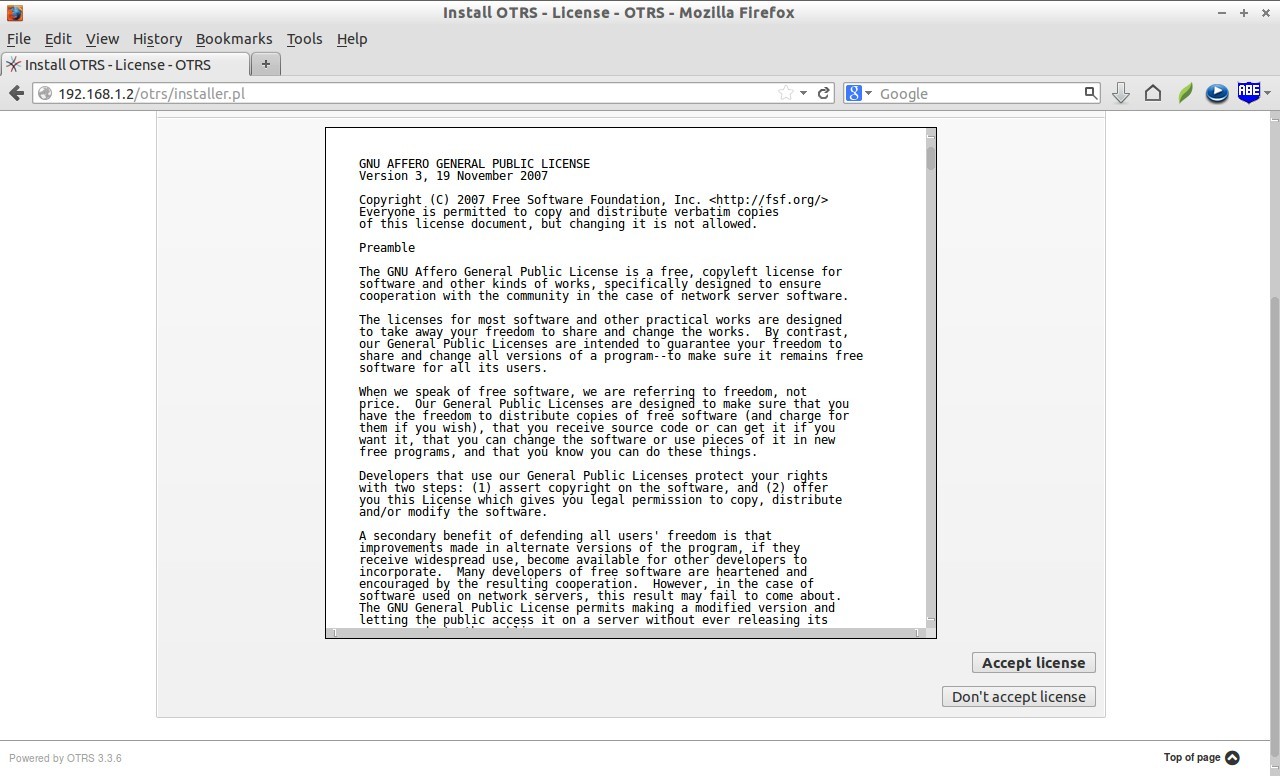
The following screen will appear. Click Next to continue.
Install OTRS - Intro - OTRS - Mozilla Firefox_002Accept the License agreement.
Install OTRS - License - OTRS - Mozilla Firefox_003Select the database type. In my case, I select the MySQL database.
Install OTRS - Database Selection - OTRS - Mozilla Firefox_004Enter the MySQL root user name and password etc. Click Check database settings button.
Install OTRS - Database MySQL - OTRS - Mozilla Firefox_005Once you check the button “Check database settings”, a default database and user  will be automatically created. You can change these values as per your liking, or leave the default selection and click next to continue.
Install OTRS - Database MySQL - OTRS - Mozilla Firefox_006
Now the new database will be created. Click Next to continue.
Install OTRS-Create Database - OTRS - Mozilla Firefox_007
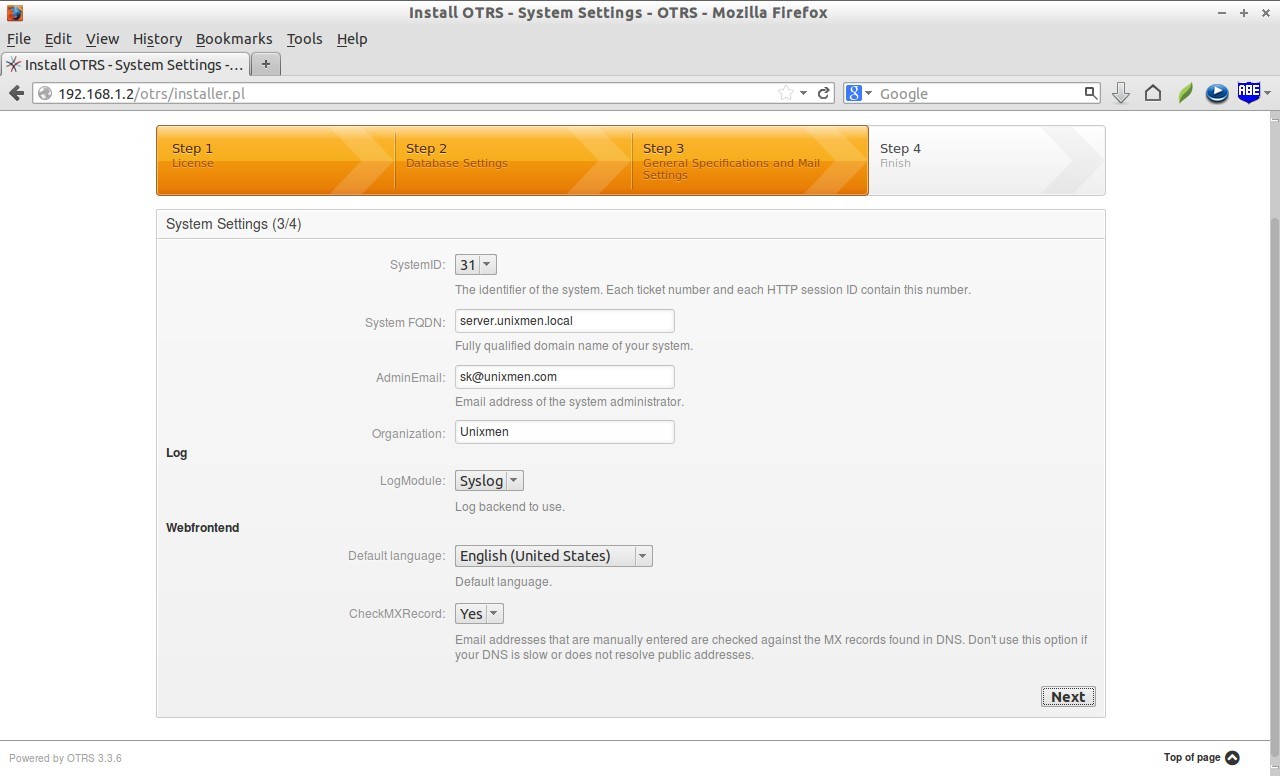
Enter the administrator Email for OTRS, system FQDN, organization name etc. And, click Next.
Install OTRS - System Settings - OTRS - Mozilla Firefox_008
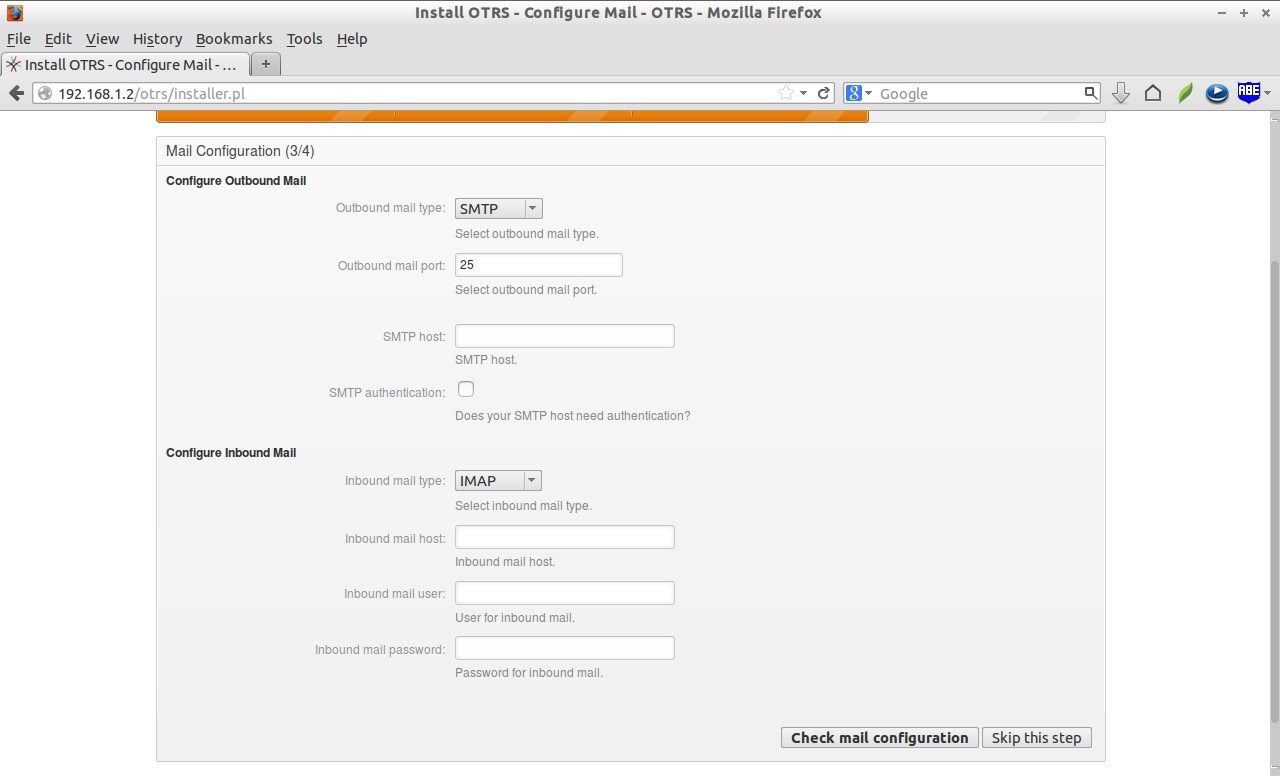
Next, you’ll be prompted to enter the inbound and outbound mail settings. Also, You can setup this option later in the administration dashboard.
Install OTRS - Configure Mail - OTRS - Mozilla Firefox_009Congratulations! We have successfully implemented the OTRS system. Note down the the default username and password of the administrative account.
Install OTRS - Finished - OTRS - Mozilla Firefox_010As you see in the above screenshot, the installer shows you the the administrative login URL, default username and password.

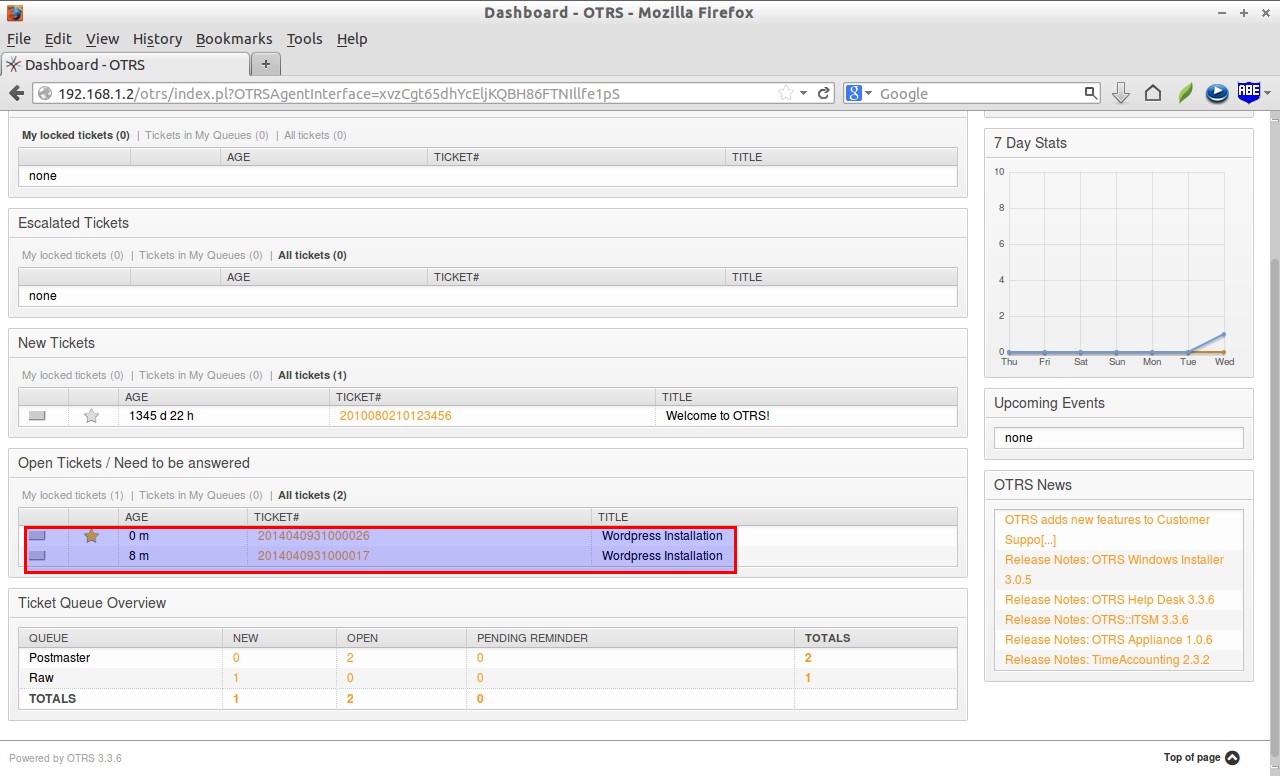
Access OTRS dashboard

Navigate to http://ip-address/otrs/otrs/index.pl from your browser. Enter the default user name and password.
Login - OTRS - Mozilla Firefox_012
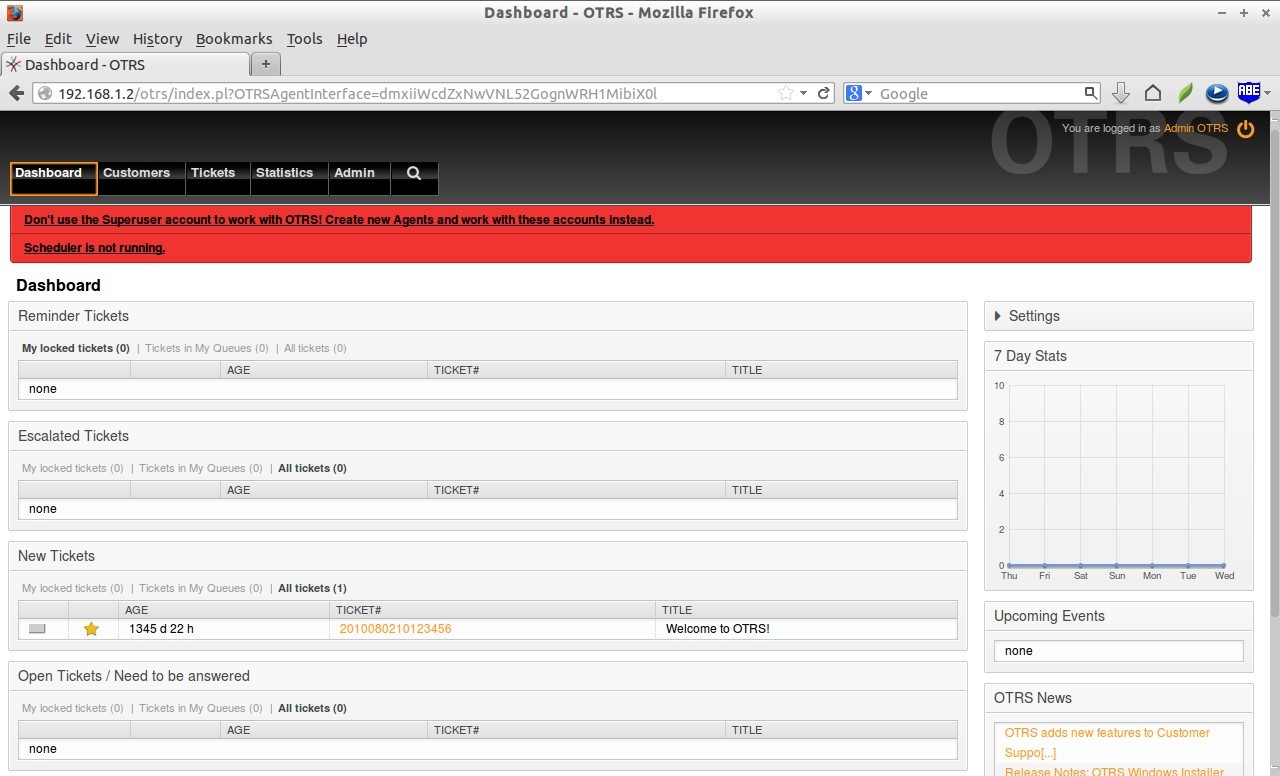
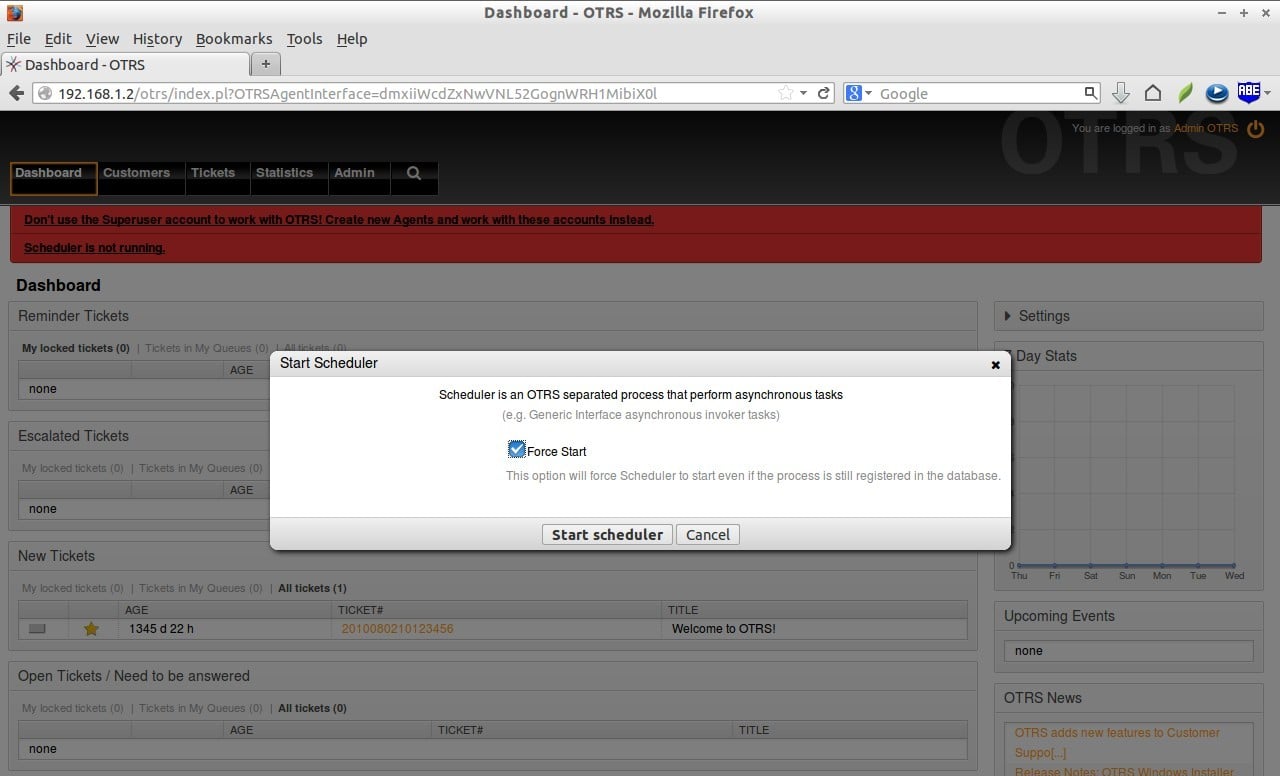
This is how the OTRS administrative dashboard looks.
Dashboard - OTRS - Mozilla Firefox_013
After successful installation, we have to do some installation tasks. The first one is to start the scheduler. Click on the warning link that says: “Scheduler is not running” on the top.
Click Start Scheduler button.
Dashboard - OTRS - Mozilla Firefox_014
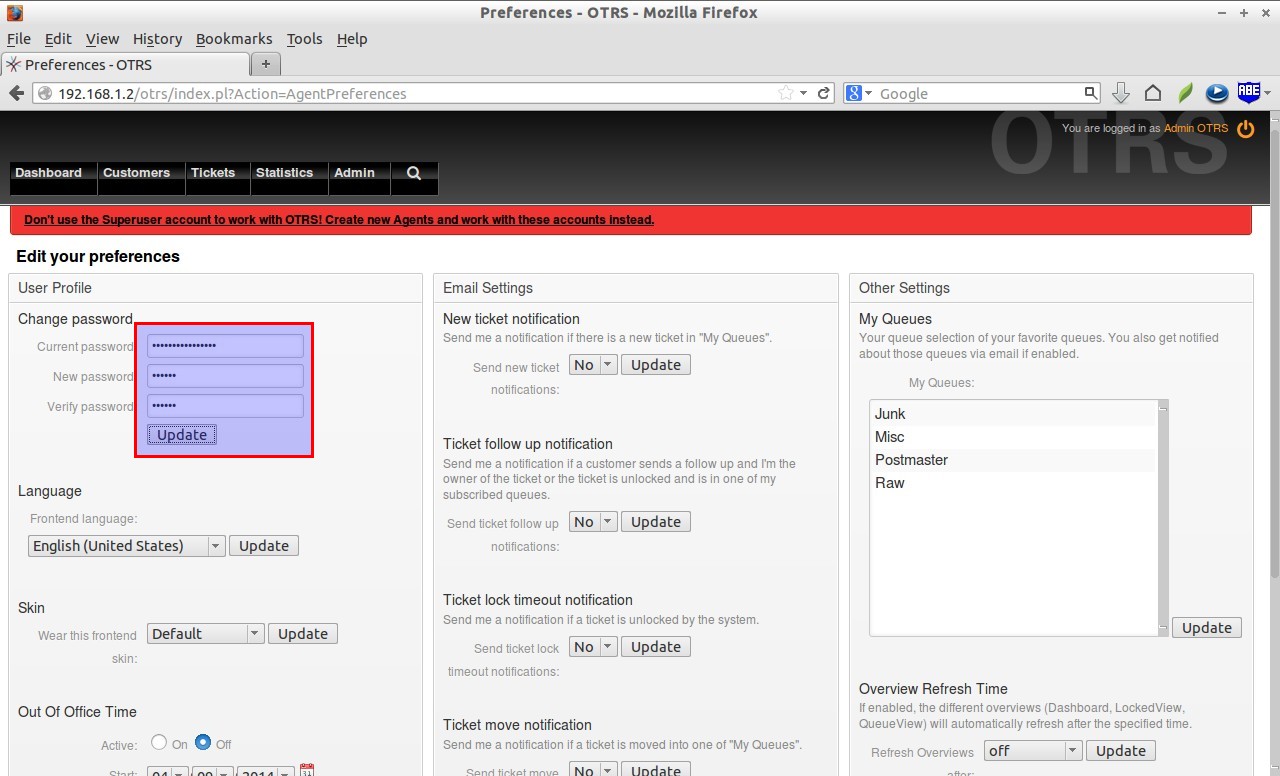
Next change the default password of the admin account(root@locahost) by clicking on the username on the upper top right corner.
Enter the current password, and enter the new password twice. Finally, click Update.
Preferences - OTRS - Mozilla Firefox_015

OTRS Administration

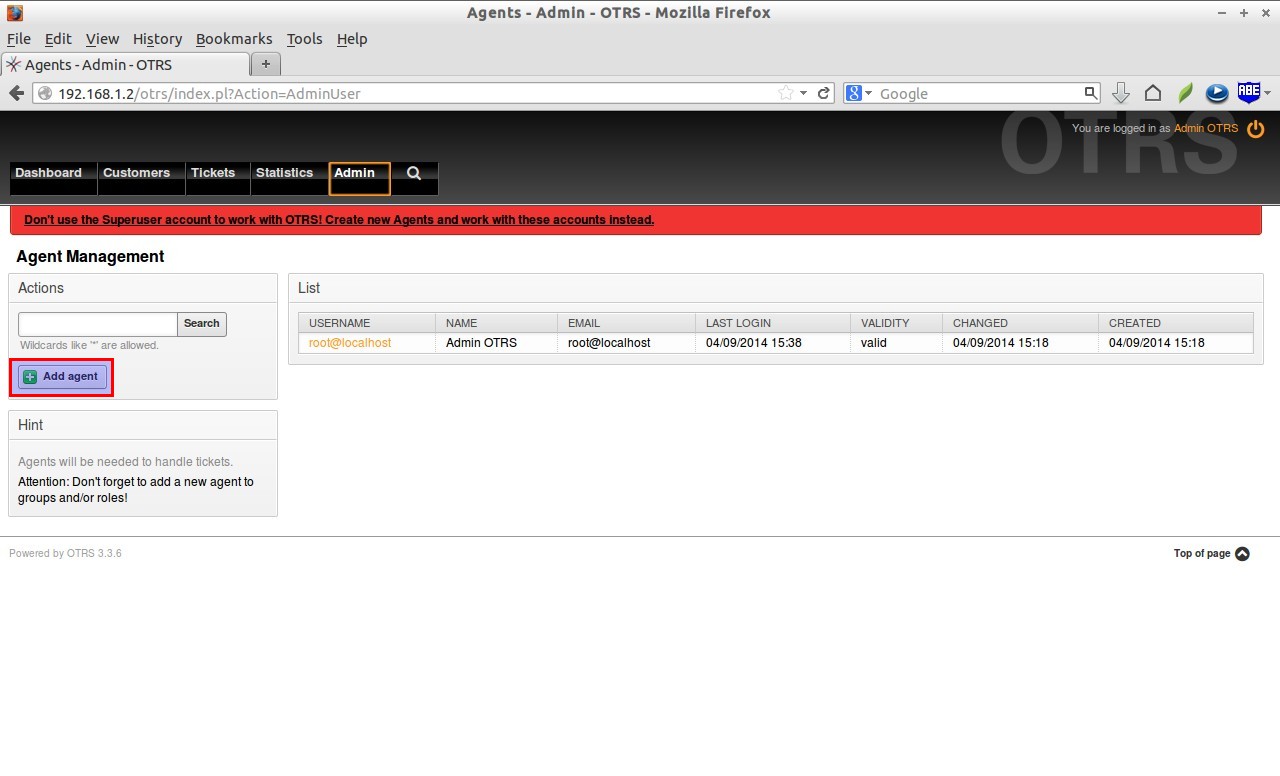
As you may know, working on OTRS with admin user is not recommended. So, create new users(agents).
Go to the Admin section on the top menu bar, and select Agents to create new user.
Admin - OTRS - Mozilla Firefox_016
Click on the Add Agent Link on the left.
Agents - Admin - OTRS - Mozilla Firefox_018
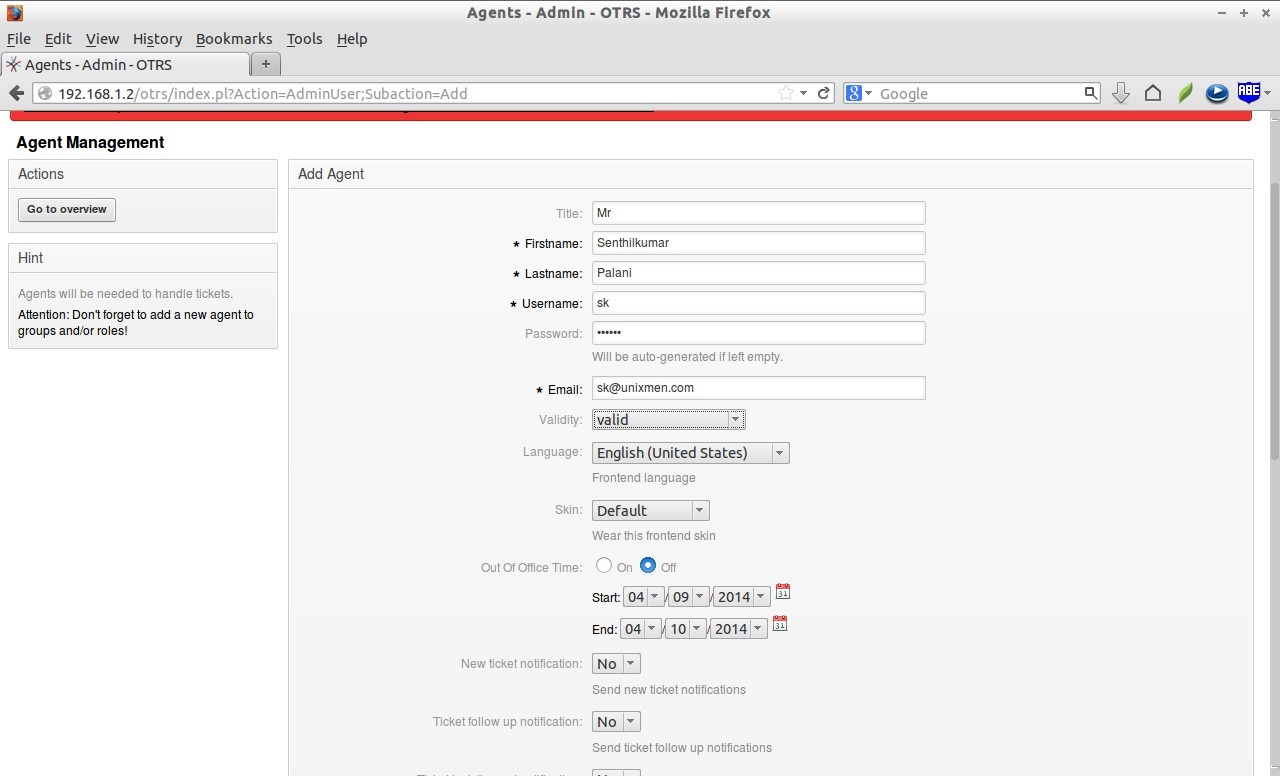
Fill up the details such as first name, last name, password, and email id etc. Then, click Submit button.
Agents - Admin - OTRS - Mozilla Firefox_019
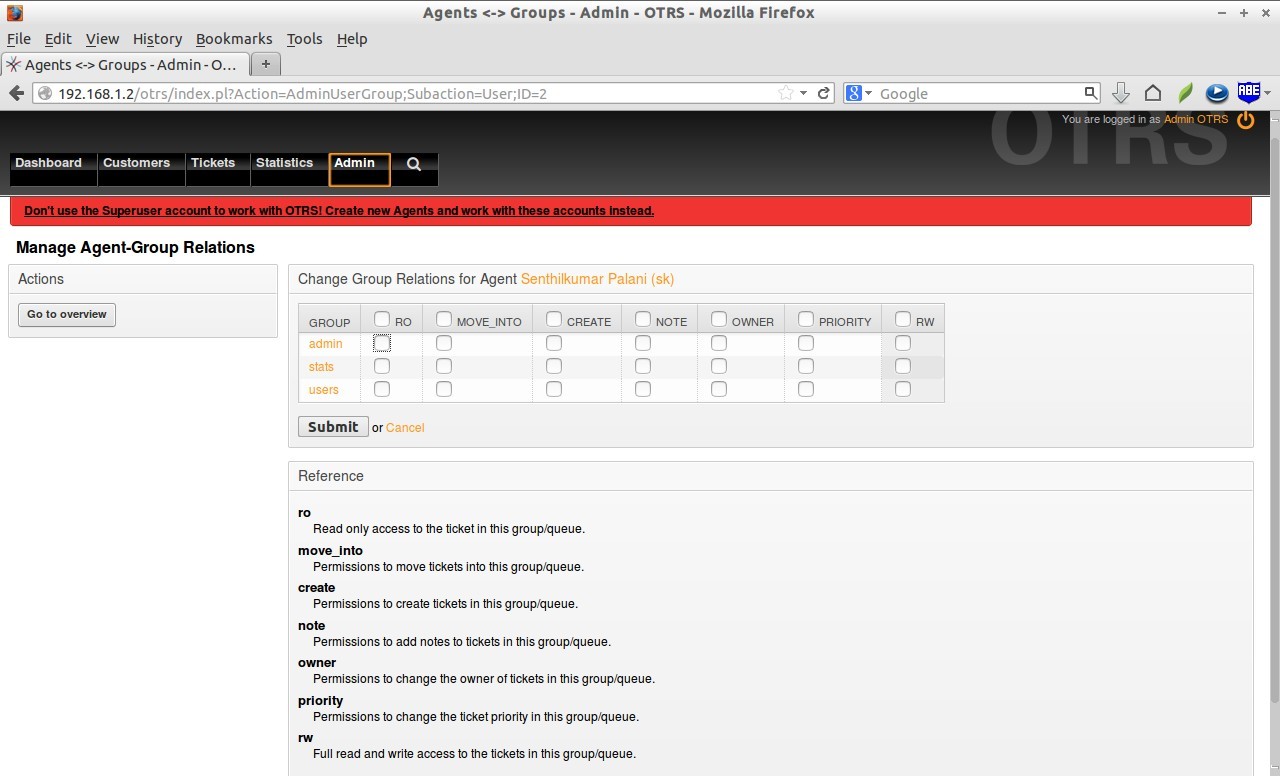
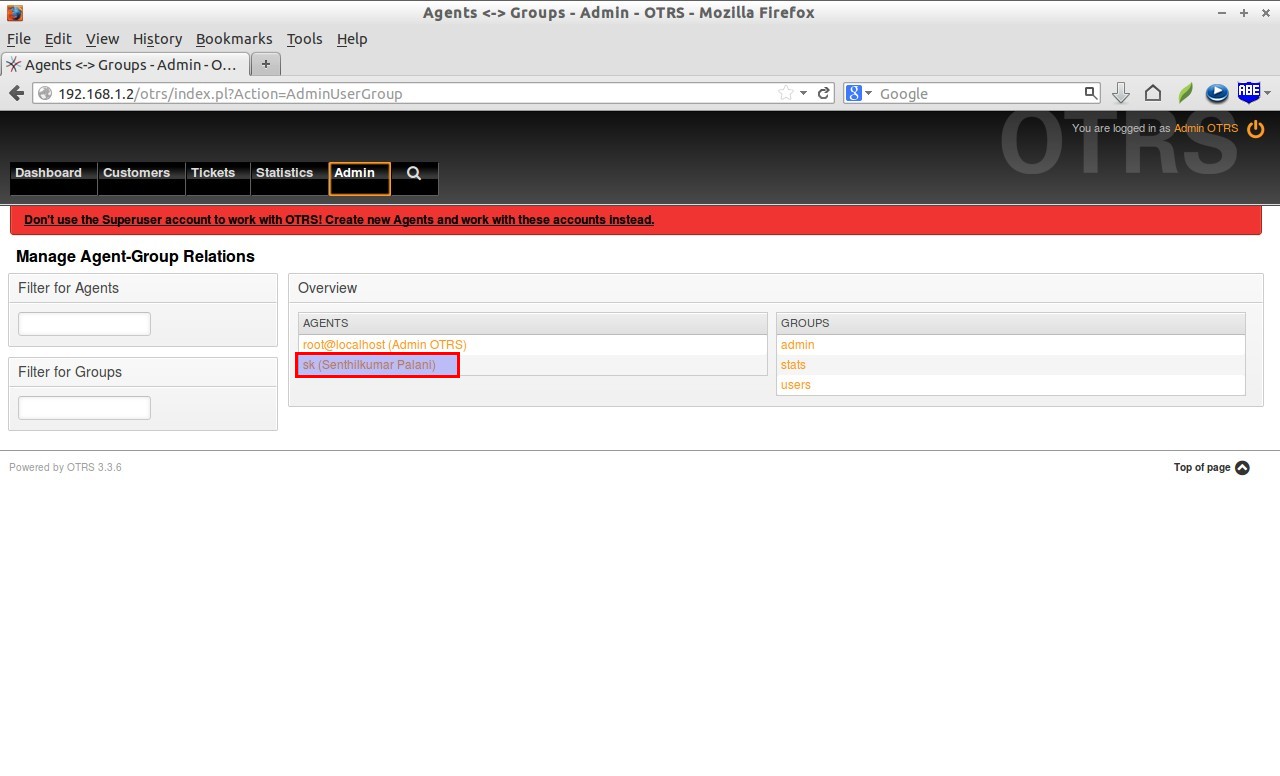
Next choose the group relations for the new agent. Then, click Submit button.
Agents --- Groups - Admin - OTRS - Mozilla Firefox_020The new agent will be created now.
Agents --- Groups - Admin - OTRS - Mozilla Firefox_022
By this way, you create more users(agents), groups, roles, customers etc from the Admin section.
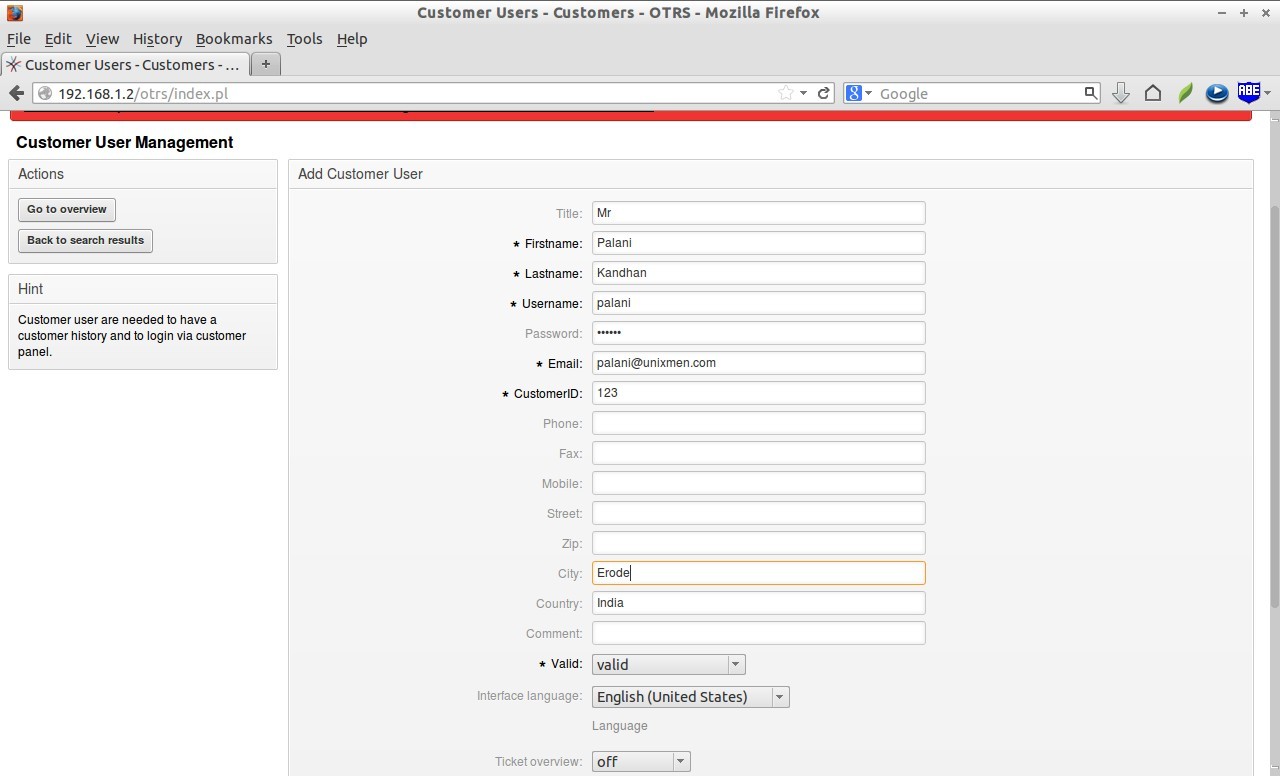
Customer user:
Customer Users - Customers - OTRS - Mozilla Firefox_025

Create Tickets

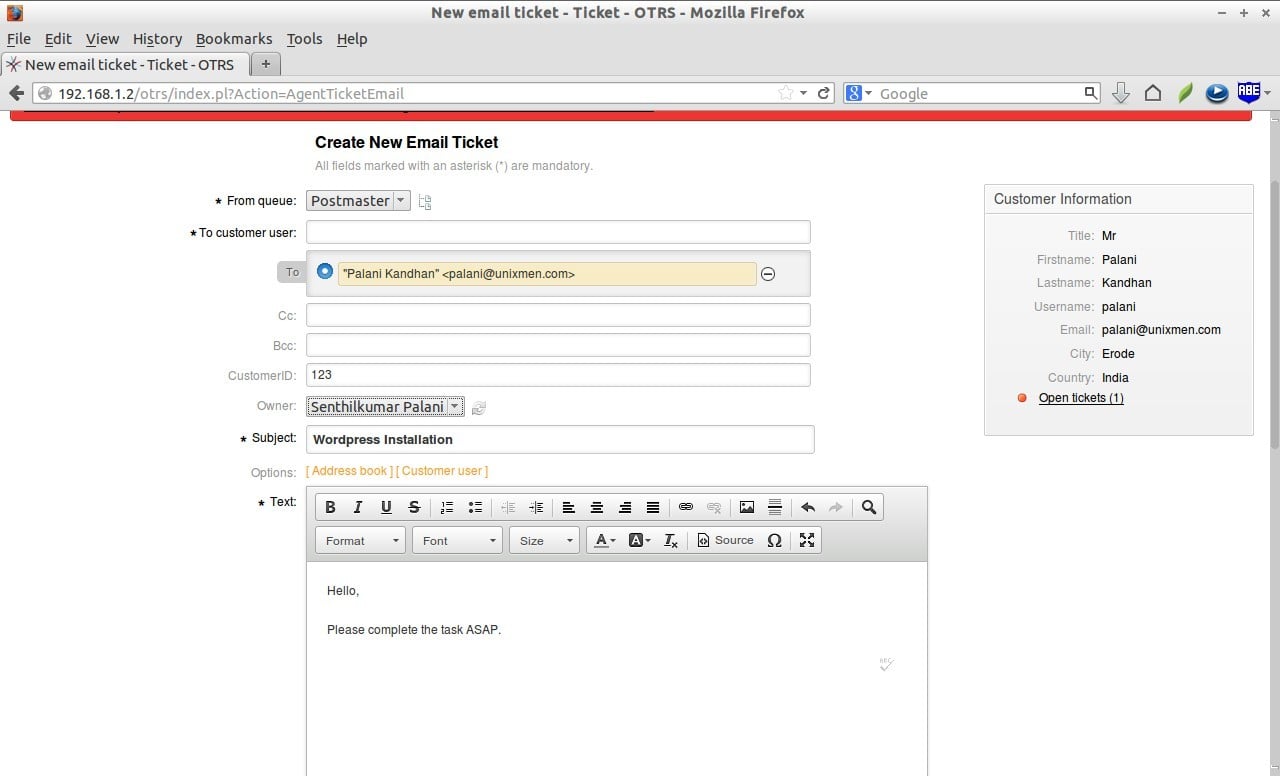
Let us create a sample ticket, and assign this ticket to Agent sk. Navigate to Tickets -> New email ticket or Phone ticket.
Enter the customer user mail id, subject and body of the mail. Click on the Owner drop down box and select the Agent name. Finally, click Send mail. A new ticket will be created and assigned to the agent sk.
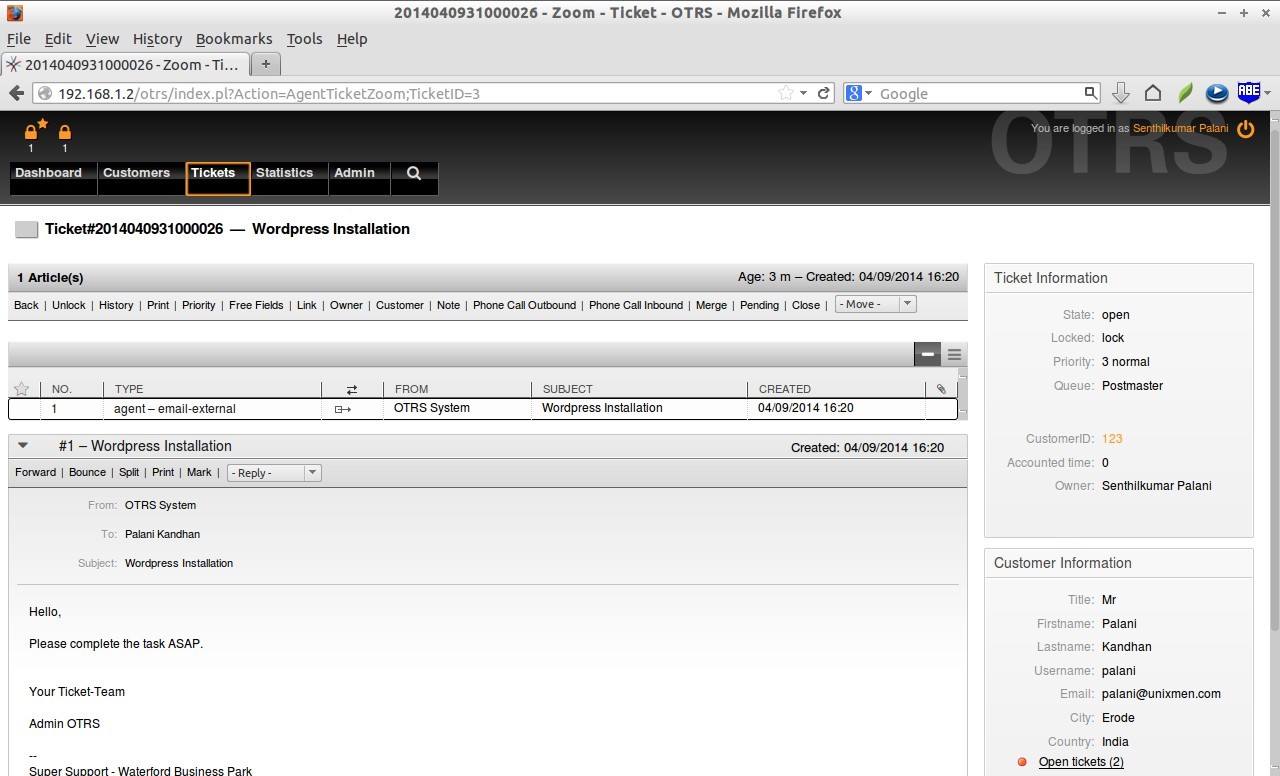
Sample Email ticket:
New email ticket - Ticket - OTRS - Mozilla Firefox_028Whenever, the agent sk, log in to the PTRS, he will see a ticket has been assigned to him in his dashboard.
Dashboard - OTRS - Mozilla Firefox_029The agent can see the full details of the new ticket by clicking on it.
2014040931000026 - Zoom - Ticket - OTRS - Mozilla Firefox_030
That’s it. For more details, look at the official documentation page.
Cheers!

How To Install CentOS Web Panel In CentOS

How To Install CentOS Web Panel In CentOS

by 
Please shareShare on FacebookShare on Google+Tweet about this on TwitterShare on LinkedInShare on RedditDigg thisShare on StumbleUpon

About CentOS Web Panel

There are so many free and paid Control panels available nowadays. We will, today, discuss about CentOS Web panel(CMP), specially designed for RPM based distributions like CentOS, RHEL, Scientific Linux etc. CWP is a free, Open Source control panel that can be widely used for deploying a Web hosting environment easily. Unlike other Control panels, CWP is automatically deploy the LAMP stack with Varnish Cache server.

Features

CWP comes with lot of features and free services. As I mentioned before, CWP automatically installs full LAMP stack (apache, php, phpmyadmin, webmail, mailserver etc.) on your server.
Here is the complete list of features and software that will be automatically installed and configured during CWP installation.

List of softwares to be installed and configured during CWP installation:

  • Apache Web Server
  • PHP 5.4
  • MySQL + phpMyAdmin
  • Postfix + Dovecot + roundcube webmail
  • CSF Firewall
  • File System Lock (no more website hacking, all your files are locked from changes)
  • Backups; AutoFixer for server configuration

3rd Party Applications:

  • CloudLinux + CageFS + PHP Selector
  • Softaculous – Script Installer (Free and Premium)

Web Server:

  • Varnish Cache server
  • Compiles Apache from source
  • Apache reCompiler + Additional modules
  • Apache server status, configuration
  • Edit apache vhosts, vhosts templates, include configuration
  • Rebuild all apache Virtual hosts
  • suPHP & suExec
  • Mod Security + OWASP rules
  • Tomcat 8 server management
  • DoS protection
  • Perl cgi script support

PHP:

  • Compiles PHP from source
  • PHP Switcher (switch between PHP versions like: 5.2, 5.3, 5.4, 5.5)
  • PHP Selector select PHP version per user or per folder (PHP 4.4, 5.2, 5.3, 5.4, 5.5, 5.6)
  • Simple php editor
  • Simple php.ini generator in the users panel
  • PHP addons
  • PHP.ini editor & PHP info & List modules
  • php.ini per user account
  • FFMPEG, For Video streaming websites
  • CloudLinux + PHP Selector

User Management

  • Add, List, Edit adn Remove Users
  • User Monitoring
  • Shell access management
  • User Limit Managment
  • Limit Processes
  • Limit Open Files
  • User FTP & File Manager
  • CloudLinux + CageFS
  • Dedicated IP per account

DNS:

  • FreeDNS
  • Add, Edit, List and Remove DNS zones
  • Edit nameserver IPs
  • DNS zone template editor
  • New Easy DNS Zone Manager (with ajax)
  • New DNS Zone list with Additional resolving information using google (also checking rDNS, nameservers….)

Email:

  • Postfix & dovecot
  • MailBoxes, Alias
  • Roundcube webmail
  • Postfix Mail queue
  • rDNS Checker Module
  • AntiSPAM
  • SPF & DKIM Integration
  • Re-Build Postfix/Dovecot Mail server with AntiVirus, AntiSpam Protection
  • Email Auto Responder

System:

  • CPU core and clock info
  • Memory usage info
  • Detailed Disk status
  • Software Info like kernel version, uptime etc.
  • Services Status
  • ChkConfig Manager
  • Network port usage
  • Network configuration
  • SSHD configuration
  • Auto-Fixer (checks important configuration and tries to auto-fix issues)

Monitoring:

  • Monitor services eg. top, apache stats, mysql etc.
  • Use Java SSH Terminal/Console within panel
  • Services Configuration (eg. Apache, PHP, MySQL etc)
  • Run shell commands in screen/background

Security:

  • CSF Firewall
  • SSL generator
  • SSL Certificate Manager
  • CloudLinux + CageFS

SQL:

  • MySQL Database Management
  • Add local or remote access user
  • Live Monitor MySQL process list
  • Create, Remove database
  • Add additional users per database
  • MySQL server configuration
  • PhpMyAdmin
  • PostgreSQL, phpPgAdmin Support

Additional options:

  • TeamSpeak 3 Manager
  • Shoutcast Manager
  • Auto-update
  • Backup manager
  • File Manager
  • Virtual FTP users per domain
  • cPanel Account Migration (restores files, databases and database users)
  • And many more.

Install CentOS Web Panel In CentOS 6

At the time writing this tutorial, CWP only supports upto CentOS 6.x versions. It doesn’t work on CentOS 7 and later versions.

Prerequisites:

Before installing CWP, you must know the following information:
  • CWP only supports static IP addresses. It does not support dynamic, sticky, or internal IP addresses.
  • CWP doesn’t has an uninstaller. After you install CWP, you must reinstall the server to remove it.
  • Only install CWP on a freshly installed operating system without any configuration changes.
  • Need atleast 512MB RAM for 32 bit systems.
  • 1024MB for 64 bit systems.
  • Need 4GB RAM or more to deploy all modules.
  • At least 20GB or hard disk space is required.
For testing purpose in VirtualBox, 640MB RAM and 10GB hdd space is enough.

Update server:

Install wget package first. This is needed to download CWP.
yum install wget -y
Update your server using command:
yum update -y
Reboot once to take effect the changes.

Install CWP:

Change to /usr/local/src/ directory:
cd /usr/local/src
Download latest CWP version with command:
wget http://centos-webpanel.com/cwp-latest
If the above URL doesn’t work, use the following link instead.
wget http://dl1.centos-webpanel.com/files/cwp-latest
Then, start CWP installer using command:
sh cwp-latest
Sample output:
root@server:-usr-local-src_001
root@server:-usr-local-src_002
The installation will take upto 30 minutes or more depending upon your Internet speed.
Finally, you’ll see the installation completed message like below. Note down the details such as mysql root user password and login URLs of CWP. You”ll need them later. Then Press Enter key to reboot your system.
root@server:-usr-local-src_004
After booting into the system, you will see the CWP welcome login message.
CentOS 6.5 Minimal [Running] - Oracle VM VirtualBox_006

Adjust Firewall/Router:

The CWP default web console ports are 2030(http) and 2031(https). You should allow the both ports through firewall/Router in order to access the CWP web console from a remote system.
To do that, edit:
vi /etc/sysconfig/iptables
Add the following lines:
[...]
-A INPUT -p tcp -m state --state NEW -m tcp --dport 2030 -j ACCEPT
-A INPUT -p tcp -m state --state NEW -m tcp --dport 2031 -j ACCEPT
[...]
Save and close the file. Restart iptables service to take effect the changes.
service iptables restart

Accessing CWP Web Console

Open up your browser and type:
http://IP-Address:2030/
Or
https://IP-Address:2031/
You will see the following like screen.
The login credentials are:
  • Username: root
  • Password: your root password
Login | CentOS WebPanel - Mozilla Firefox_007
This is how CWP dashboard will look:
CWP.admin - Mozilla Firefox_008
Congratulations! CWP has been successfully has been installed.

CWP Basic Configuration

Next, we have to do couple of things such as:
  1. Setup nameservers
  2. Setup shared ip (must be your public IP address)
  3. Setup at least one hosting package (or edit default package)
  4. Setup root email, etc.

Setup nameservers:

To setup nameservers, go to DNS Functions -> Edit nameservers IPs.
CWP.admin - Mozilla Firefox_009
Set your nameservers and click Save changes button.
CWP.admin - Mozilla Firefox_010

Setup Shared IP And Root mail ID:

This is important step to host websites on your host. To setup shared IP, go to CWP Settings -> Edit settings.
CWP.admin - Mozilla Firefox_011
Enter your Static IP and Email ID, and Click Save settings button.
CWP.admin - Mozilla Firefox_012
Now, CWP is ready to host websites.

Setup hosting package:

A hosting package is nothing but a Web hosting plan that consists of allowed diskspace, bandwidth, no of FTP accounts, no of email ids, and no of databases etc. You can setup any number of web hosting plans as your wish.
To add a package, go to Packages – Add a Package from the CWP console.
CWP.admin - Mozilla Firefox_013
Enter the name of the package, amount of Diskquota/RAM allowed, FTP/Email accounts, Databases, and subdomains etc. Click Save settings button to create the web hosting plan.
CWP.admin - Mozilla Firefox_014
Now, CWP is ready to host your domains.

Adding Domains:

To create a new Domain, you to have at least one user account.
To add a user, go to User Accounts -> New Account.
Enter the domain(ex.unixmen.com), username, password and Email id etc. Finally, click Create.
CWP.admin - Mozilla Firefox_016
Now, let us add a new domain.
To add a domain, go to Domains -> Add Domain.
Enter the Domain and assign the domain the users of your choice.
CWP.admin - Mozilla Firefox_017

Conclusion

In this tutorial, we have seen how to install and configure CentOS Web Panel to create a simple web hosting environment. CWP is very simple to install and use. Even a novice user can create a basic web hosting server in a couple of hours. Also, CWP is completely free to use and open source. Give it a try! You won’t be disappointed.
You can find the more details about CWP in the CentOS Web Panel Wiki page.
Cheers!